

I walked into the kitchen with a tired sigh and a cold glass of water that felt more like a chore than a refreshment. I wanted something bright, light, and a little helpful for my electrolytes after a long day. So I pulled out a bag of frozen raspberries and a lemon, and I made a small batch of gummies that tasted like summer and felt like a tiny refill station for my body and my mood. They set up quickly. They lasted the week. And they became a small, joyful ritual when I needed an easy lift.
Why Raspberry Lemonade Electrolyte Gummies (keto friendly) Deserves a Spot in Your Weekly Rotation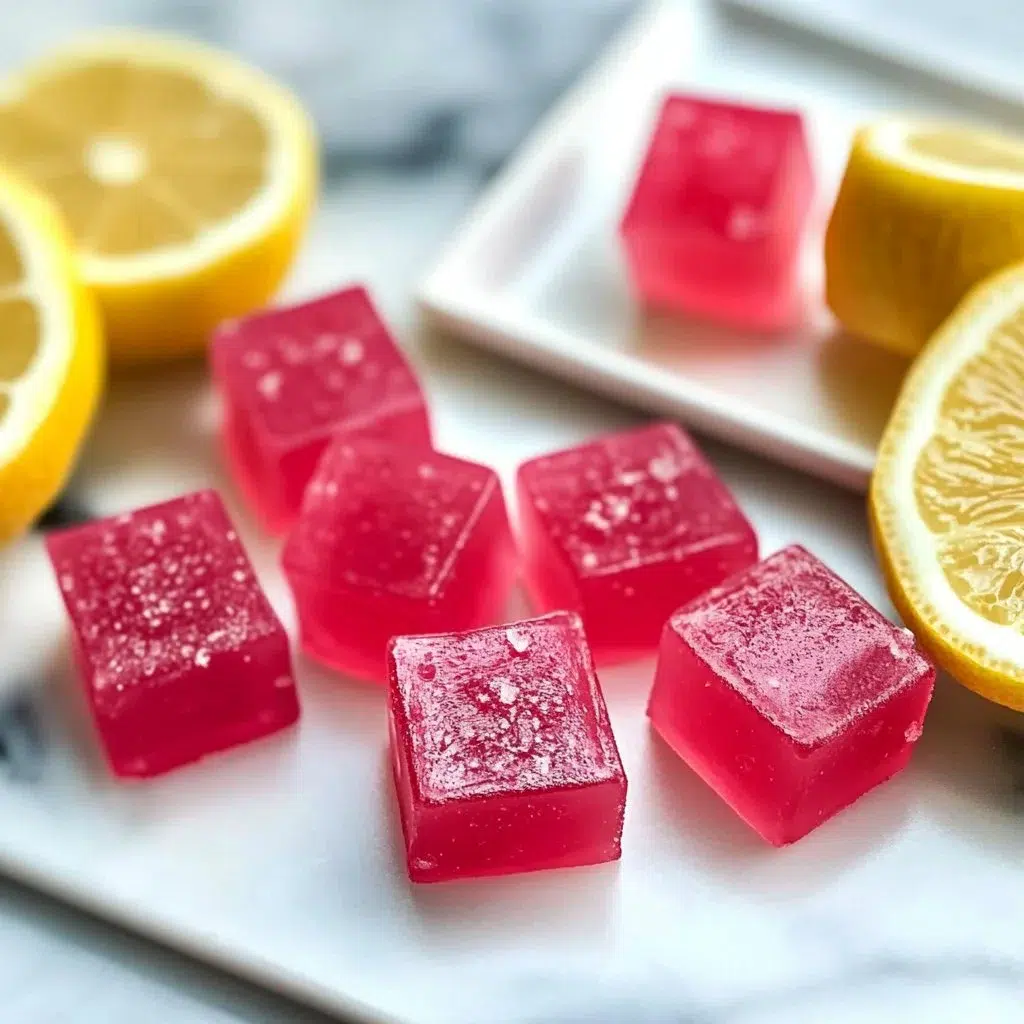
These gummies are small comfort with a real purpose. They bring fresh raspberry brightness and tangy lemon together, then add a gentle boost of electrolytes so you can sip less and feel steadier during busy days. Prep takes under 20 minutes. They chill while you tidy up the kitchen. You get fewer dishes and a little pantry victory.
I love that they fit into a keto plan without extra fuss. They make a great grab-and-go treat after a walk, between meetings, or when you need a gentle pick-me-up without sugar. They sit well in the fridge beside my tea mug, looking cheerful whenever I pass the counter.
How to Make Raspberry Lemonade Electrolyte Gummies (keto friendly) the Zinnia Way
“The best kind of recipe? The kind you can start after work and still eat before the sun sets.”
This recipe comes together like a small science experiment you can trust. You simmer raspberries to pull out vibrant color and flavor. You bloom the gelatin so the texture is smooth and jiggly, not gluey. You warm gently to dissolve everything and then pour into molds to chill.
Pay attention to aroma and color. When the pot smells sweet and tart and looks like rosy lemonade, you are on track. If the gelatin looks grainy, heat and stir a little more. It will smooth out. These signals let you know the texture will be right.
What You’ll Need for Raspberry Lemonade Electrolyte Gummies (keto friendly) OR Gathering Ingredients the Easy Way
Full list of ingredients with warm notes below.
Ingredients
- 1 cup fresh or frozen raspberries
- Fresh gives the brightest flavor. Frozen works perfectly and saves a trip to the store.
- 1/2 cup freshly squeezed lemon juice (about 2 lemons)
- Fresh lemon makes the flavor sing. Bottle juice will work in a pinch.
- 1/2 cup water for simmering the berries
- Use filtered water if you like a cleaner taste.
- 1 cup water room temperature
- This helps bloom the gelatin evenly.
- 5 tablespoons grass-fed gelatin powder
- This gives a firm, chewy bite that feels like a candy. Do not skip blooming.
- 1/3 cup allulose or 1/2 cup powdered erythritol, or to taste
- Allulose stays soft and good in the fridge. Erythritol can feel a little grainy. Use what you like.
- 1/8 teaspoon fine sea salt
- Salt lifts the flavors and makes the lemon and raspberry pop.
- 1/8 teaspoon potassium chloride powder or a small pinch of a potassium-based salt substitute
- This adds a potassium electrolyte. Measure carefully and follow package guidance.
- 1/8 teaspoon magnesium citrate powder, optional
- A tiny amount helps round the electrolyte profile. Only add if you already use magnesium supplements or your doctor okays it.
- 1/2 teaspoon vanilla extract, optional
- A soft, warm note that balances the tartness.
Tools
- Small saucepan
- Fine mesh sieve or chinois
- Silicone gummy molds or an 8×8 inch baking dish lined with parchment
- Whisk and silicone spatula
- Measuring spoons and cups
A few gentle notes before you start
- If you do not take potassium or magnesium supplements, check with your doctor before adding concentrated powders. A little goes a long way.
- If you prefer a store-bought electrolyte packet, you can swap one packet for the salt and powder ingredients. It makes things even easier.
- Gelatin sets best when you bloom it in cold liquid. Do not skip that step. You will thank me.
Step-by-Step Instructions
- Simmer the raspberries
- Put raspberries and 1/2 cup water into a small saucepan.
- Bring to a low simmer over medium heat and mash gently as they soften.
- Cook 4 to 5 minutes until the fruit breaks down and smells bright and floral.
- Strain the puree
- Pour the raspberry mixture through a fine mesh sieve into a bowl.
- Press with the back of a spoon to get as much juice as you can.
- Discard the seeds and keep the deep pink liquid.
- Combine the liquids
- In the saucepan, stir together the raspberry liquid, lemon juice, and 1 cup room temperature water.
- Keep the mixture cool enough to sprinkle gelatin on top without clumping.
- Taste; if you want more lemon, add a splash now.
- Bloom the gelatin
- Sprinkle the gelatin evenly over the liquid and let it sit for 2 to 3 minutes.
- You will see the gelatin absorb and swell. This is called blooming and it is important for texture.
- Do not stir yet.
- Warm to dissolve
- Place the saucepan over low heat and whisk gently until the gelatin dissolves.
- Heat just until warm and smooth. Do not boil.
- If you see bits of graininess, keep whisking for another minute; it will smooth out.
- Add sweetener and electrolytes
- Stir in the chosen sweetener, sea salt, potassium chloride, and magnesium citrate if using.
- Taste carefully and adjust sweetness in small steps.
- Add vanilla if you like. A little goes a long way.
- Pour into molds
- Pour the warm mixture into silicone molds or the prepared baking dish.
- Tap the molds once on the counter to release air bubbles.
- If using a baking dish, chill and cut into squares later.
- Chill and set
- Place the molds in the fridge for at least 1 to 2 hours until firm.
- They should be springy to the touch and hold their shape.
- If you used an 8×8 dish, cut into small squares after firming.
- Unmold and finish
- Gently pop gummies from the silicone molds.
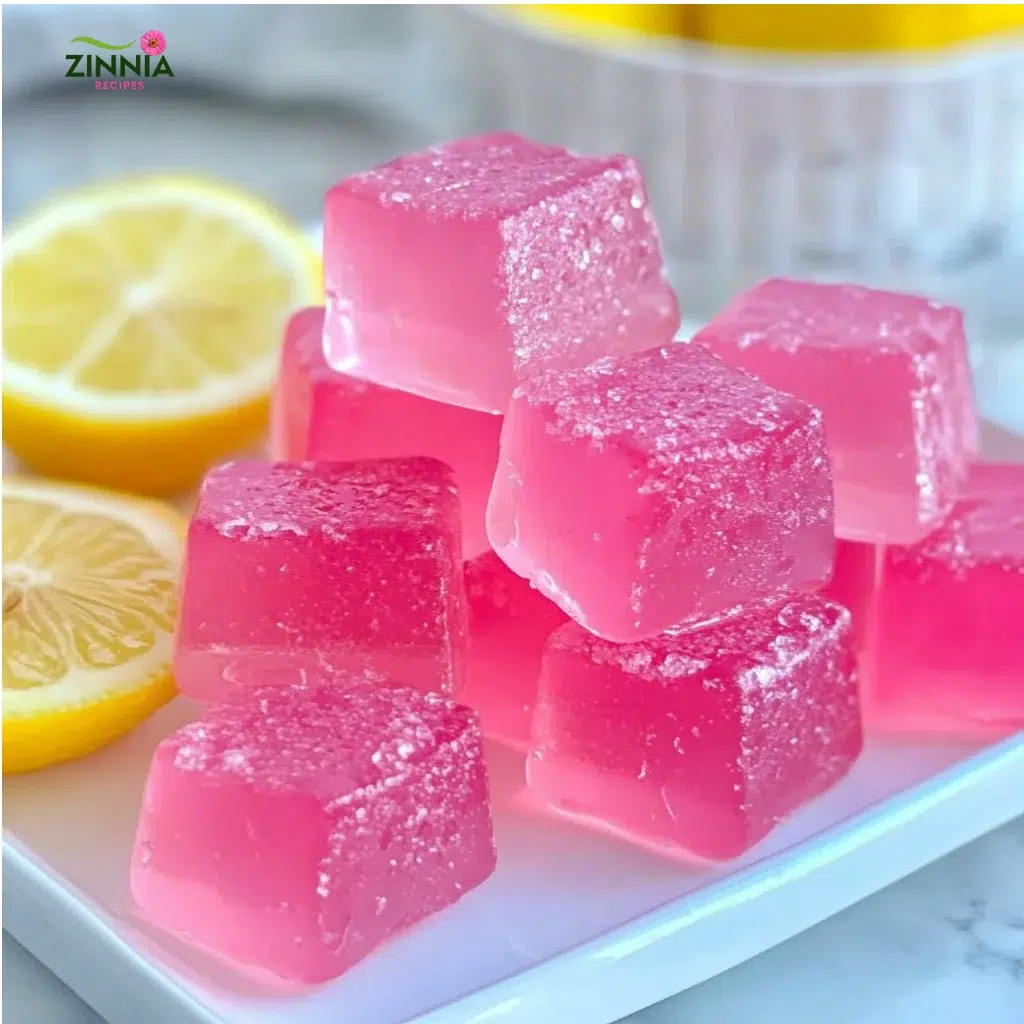
- If you like, roll them lightly in a bit of powdered erythritol for a sugared look.
- Store in an airtight container in the fridge.
Serving Raspberry Lemonade Electrolyte Gummies (keto friendly) at the Table
I serve these in small glass jars by the kettle or with a pretty spoon beside a tall water bottle. They make a sweet moment in the middle of a hectic day. Sometimes I pack a few in a tiny container and tuck them into my gym bag for a post-walk treat.
They pair nicely with sparkling water for a fizzy refresher or with plain chilled water when I want just the flavor and the electrolytes. If friends stop by, I set out a small dish and tell them to help themselves. They eat like candy but feel like a little self-care.
Making It Last (Without Losing Flavor) OR Leftovers That Still Taste Like a Win
- Fridge storage: Keep gummies in an airtight container for up to 10 days. They lose a little bounce after a week but still taste great.
- Freezer storage: Lay gummies on a baking sheet until solid, then transfer to a freezer bag. They keep up to 3 months. Thaw in the fridge before enjoying.
- No reheating needed: These do not need reheating. They thaw to a pleasant texture in the fridge.
- Avoid sun and heat: Keep them cool or they will soften. If they get too soft, pop them back in the fridge for 15 to 30 minutes.
Kitchen Notes
- Gelatin substitute: Agar agar will not give the same chew. If you need a vegan option, start with 1 teaspoon agar powder per cup and expect a slightly different texture.
- Sweetener tips: Allulose gives the best soft texture. Erythritol works fine and is widely available. If using monk fruit blends, taste as you go.
- Electrolyte swaps: If you prefer not to measure powders, use one keto-friendly electrolyte packet in place of the salt and powders. It is fast and foolproof.
- Molds matter: Small molds make snack-sized gummies. If you cut from a baking dish, cut into 1-inch squares for even servings.
- Clean up: Soak the pot and sieve right after use. The raspberry stain loosens easily with warm water and a drop of dish soap.
Make It Your Own OR Zinnia-Worthy Variations
- Strawberry Lemonade: Swap raspberries for strawberries for a sweeter, floral vibe. Follow the same method.
- Citrus Medley: Add a tablespoon of orange juice for depth and a slightly sweeter finish.
- Ginger Lemon Lift: Simmer a one-inch piece of sliced fresh ginger with the raspberries. Strain out the ginger for a spicy note that warms the throat.
- Mint Raspberry: Add a few torn mint leaves to the raspberry simmer for a cool twist. Strain them out with the seeds.
- Fizzy Gummy Spritz: Drop one gummy into a glass of sparkling water for a pretty, flavored spritz.
- Stronger Electrolyte Boost: Stir in a measured electrolyte powder at the end for a higher dose. Follow package directions so you get the amount you need.
Questions About Raspberry Lemonade Electrolyte Gummies (keto friendly) OR Helpful Answers Before You Start
Can I prep these ahead?
Yes. Make them a day or two before you need them. The flavors mellow and the texture firms up nicely. They are great for weekly prep.
Are they truly keto?
Yes. When you use low-carb sweeteners like allulose or erythritol, these gummies fit a keto approach. Count your total carb intake if you track tightly.
How many gummies equal a serving?
I consider two to three small gummies a serving. They are compact, so a little goes a long way. Adjust by your appetite and electrolyte needs.
Are the electrolytes safe if I take medication?
Talk with your healthcare provider if you take blood pressure meds or potassium-sparing drugs. Electrolyte powders can interact with some medicines. I say this because I am careful about supplements and want you to be too.
Can I make these sugar-free but still taste good?
Yes. Allulose gives a soft mouthfeel and good flavor. If you use a granular sweetener, warm fully so it dissolves and taste as you go.
Until Next Time OR A Final Note
If making this recipe feels a little like reclaiming a tiny piece of your day, then it did its job. I like how these gummies make hydration feel friendly and a bit playful. They remind me that small things can bring comfort and real benefit.
I hope these Raspberry Lemonade Electrolyte Gummies (keto friendly) find a spot in your week. You have permission to make them for yourself, to share them, or to save them for the moments you need a gentle boost. You have this. It is okay if your first batch looks a little rustic. They will still taste wonderful. See you in the kitchen soon.
Conclusion
If you want a convenient commercial option to compare texture or flavor ideas, I sometimes look at the Pink Lemonade Keto Electrolyte Gummies or check this alternative to see how makers balance tart and sweet. For an easy way to add electrolytes without measuring powders, consider trying packets like the Keppi Electrolytes Powder Packets – Raspberry.
Print
Raspberry Lemonade Electrolyte Gummies (Keto Friendly)
- Total Time: 25 minutes
- Yield: 10 servings 1x
- Diet: Keto
Description
Easy-to-make Raspberry Lemonade Electrolyte Gummies that provide a refreshing boost while fitting into a keto plan.
Ingredients
- 1 cup fresh or frozen raspberries
- 1/2 cup freshly squeezed lemon juice (about 2 lemons)
- 1/2 cup water for simmering the berries
- 1 cup water (room temperature)
- 5 tablespoons grass-fed gelatin powder
- 1/3 cup allulose or 1/2 cup powdered erythritol, or to taste
- 1/8 teaspoon fine sea salt
- 1/8 teaspoon potassium chloride powder or a small pinch of a potassium-based salt substitute
- 1/8 teaspoon magnesium citrate powder (optional)
- 1/2 teaspoon vanilla extract (optional)
Instructions
- Put raspberries and 1/2 cup water into a small saucepan. Bring to a low simmer over medium heat and mash gently as they soften. Cook for 4 to 5 minutes until the fruit breaks down and smells bright and floral.
- Pour the raspberry mixture through a fine mesh sieve into a bowl. Press with the back of a spoon to get as much juice as you can. Discard the seeds and keep the deep pink liquid.
- In the saucepan, stir together the raspberry liquid, lemon juice, and 1 cup room temperature water. Keep the mixture cool enough to sprinkle gelatin on top without clumping. Taste; if you want more lemon, add a splash now.
- Sprinkle the gelatin evenly over the liquid and let it sit for 2 to 3 minutes. This is called blooming.
- Place the saucepan over low heat and whisk gently until the gelatin dissolves. Heat just until warm and smooth. Do not boil.
- Stir in the sweetener, sea salt, potassium chloride, and magnesium citrate if using. Taste carefully and adjust sweetness if needed. Add vanilla if you like.
- Pour the warm mixture into silicone molds or a prepared baking dish. Tap the molds once on the counter to release air bubbles.
- Place the molds in the fridge for at least 1 to 2 hours until firm. They should be springy to the touch and hold their shape.
- Gently pop gummies from the molds. Optionally, roll them lightly in a bit of powdered erythritol for a sugared look. Store in an airtight container in the fridge.
Notes
Gelatin sets best when bloomed in cold liquid. No need for reheating; they thaw to a pleasant texture in the fridge. Store in an airtight container for up to 10 days.
- Prep Time: 15 minutes
- Cook Time: 10 minutes
- Category: Snack
- Method: Chilling
- Cuisine: American
Nutrition
- Serving Size: 2-3 gummies
- Calories: 30
- Sugar: 1g
- Sodium: 20mg
- Fat: 0g
- Saturated Fat: 0g
- Unsaturated Fat: 0g
- Trans Fat: 0g
- Carbohydrates: 7g
- Fiber: 1g
- Protein: 1g
- Cholesterol: 0mg